Part 2: The Migration Tool
In our previous post (first showcased on Microsoft’s Premier Developer Blog), we discussed the business value of taking a single organization, single project approach for all of your enterprise or organization’s IT projects. Emphasis on this last word is placed because the word project is used in the business sense. In the language of Azure DevOps, a business project’s Work Items are fenced under an Area in the context of a single host or parent Azure DevOps Project.
In this post, we focus on fundamental techniques used in the Migration Tool which allows us to clone and more importantly merge multiple Azure DevOps projects into a single project.
The Migration Tool goes through 4 stages:
- Project Export aka Template Generation: In this stage, various configurations of the source project are exported into JSON format and at times templatized or tokenized. For instance, build and release definitions are exported in JSON format and parsed so that the referenced code repositories as well as service connections are tokenized. In doing so, we can later import the pipeline definitions into the target project by replacing the tokens with the target repositories and service endpoints. This stage consists of Azure DevOps REST API calls using the GET Method.
- Project Import: Everything but Work Items and Queries get imported at this stage. This stage relies mainly on Azure DevOps REST API calls using the POST and PUT Methods. The main items migrated are:
- Install required extensions
- Project Area and Iteration Hierarchies
- Teams, Team Settings, Team Boards
- Service Connections aka Service Endpoints
- Git repositories along with commit history, pull requests, branches, and tags
- Build Definitions
- Release Definitions
- Security Template Generation based on the above migrated items
- Migration of Work Items and Shared Queries: This stage leverages Martin Hinshelwood’s migration tool. The only modification brought is the ability to add an arbitrary PrefixPath to the area and iteration paths of migrated work items in order to merge projects into a common Portfolio and/or Program and/or Product hierarchy. Note that by default, work item history is preserved but one can choose to only migrate the latest work items or even a subset thereof.
- Security Configuration: This is the last stage and possibly the one that has the greatest variance in terms of enterprises’ requirements. Currently, the tool adds a default layer of security by fencing members of the default migrated team in such a way that they have Contributor rights to migrated items of the source project only. In other words, if member A is only part of the default team of Project X and member B is only part of the default team of Project Y, then, once Projects X and Y are merged into a single host project, member A only has access to Project X items and member B only has access to Project Y items. Security will be discussed in further detail in Part 3 of this Blog series.
As mentioned previously, the Migration Tool heavily depends on the Azure DevOps Services REST API. As of the time of this writing, the REST API is at version 5.0 with version 5.1 in preview. Here’s a sample REST call to list all projects in an organization:
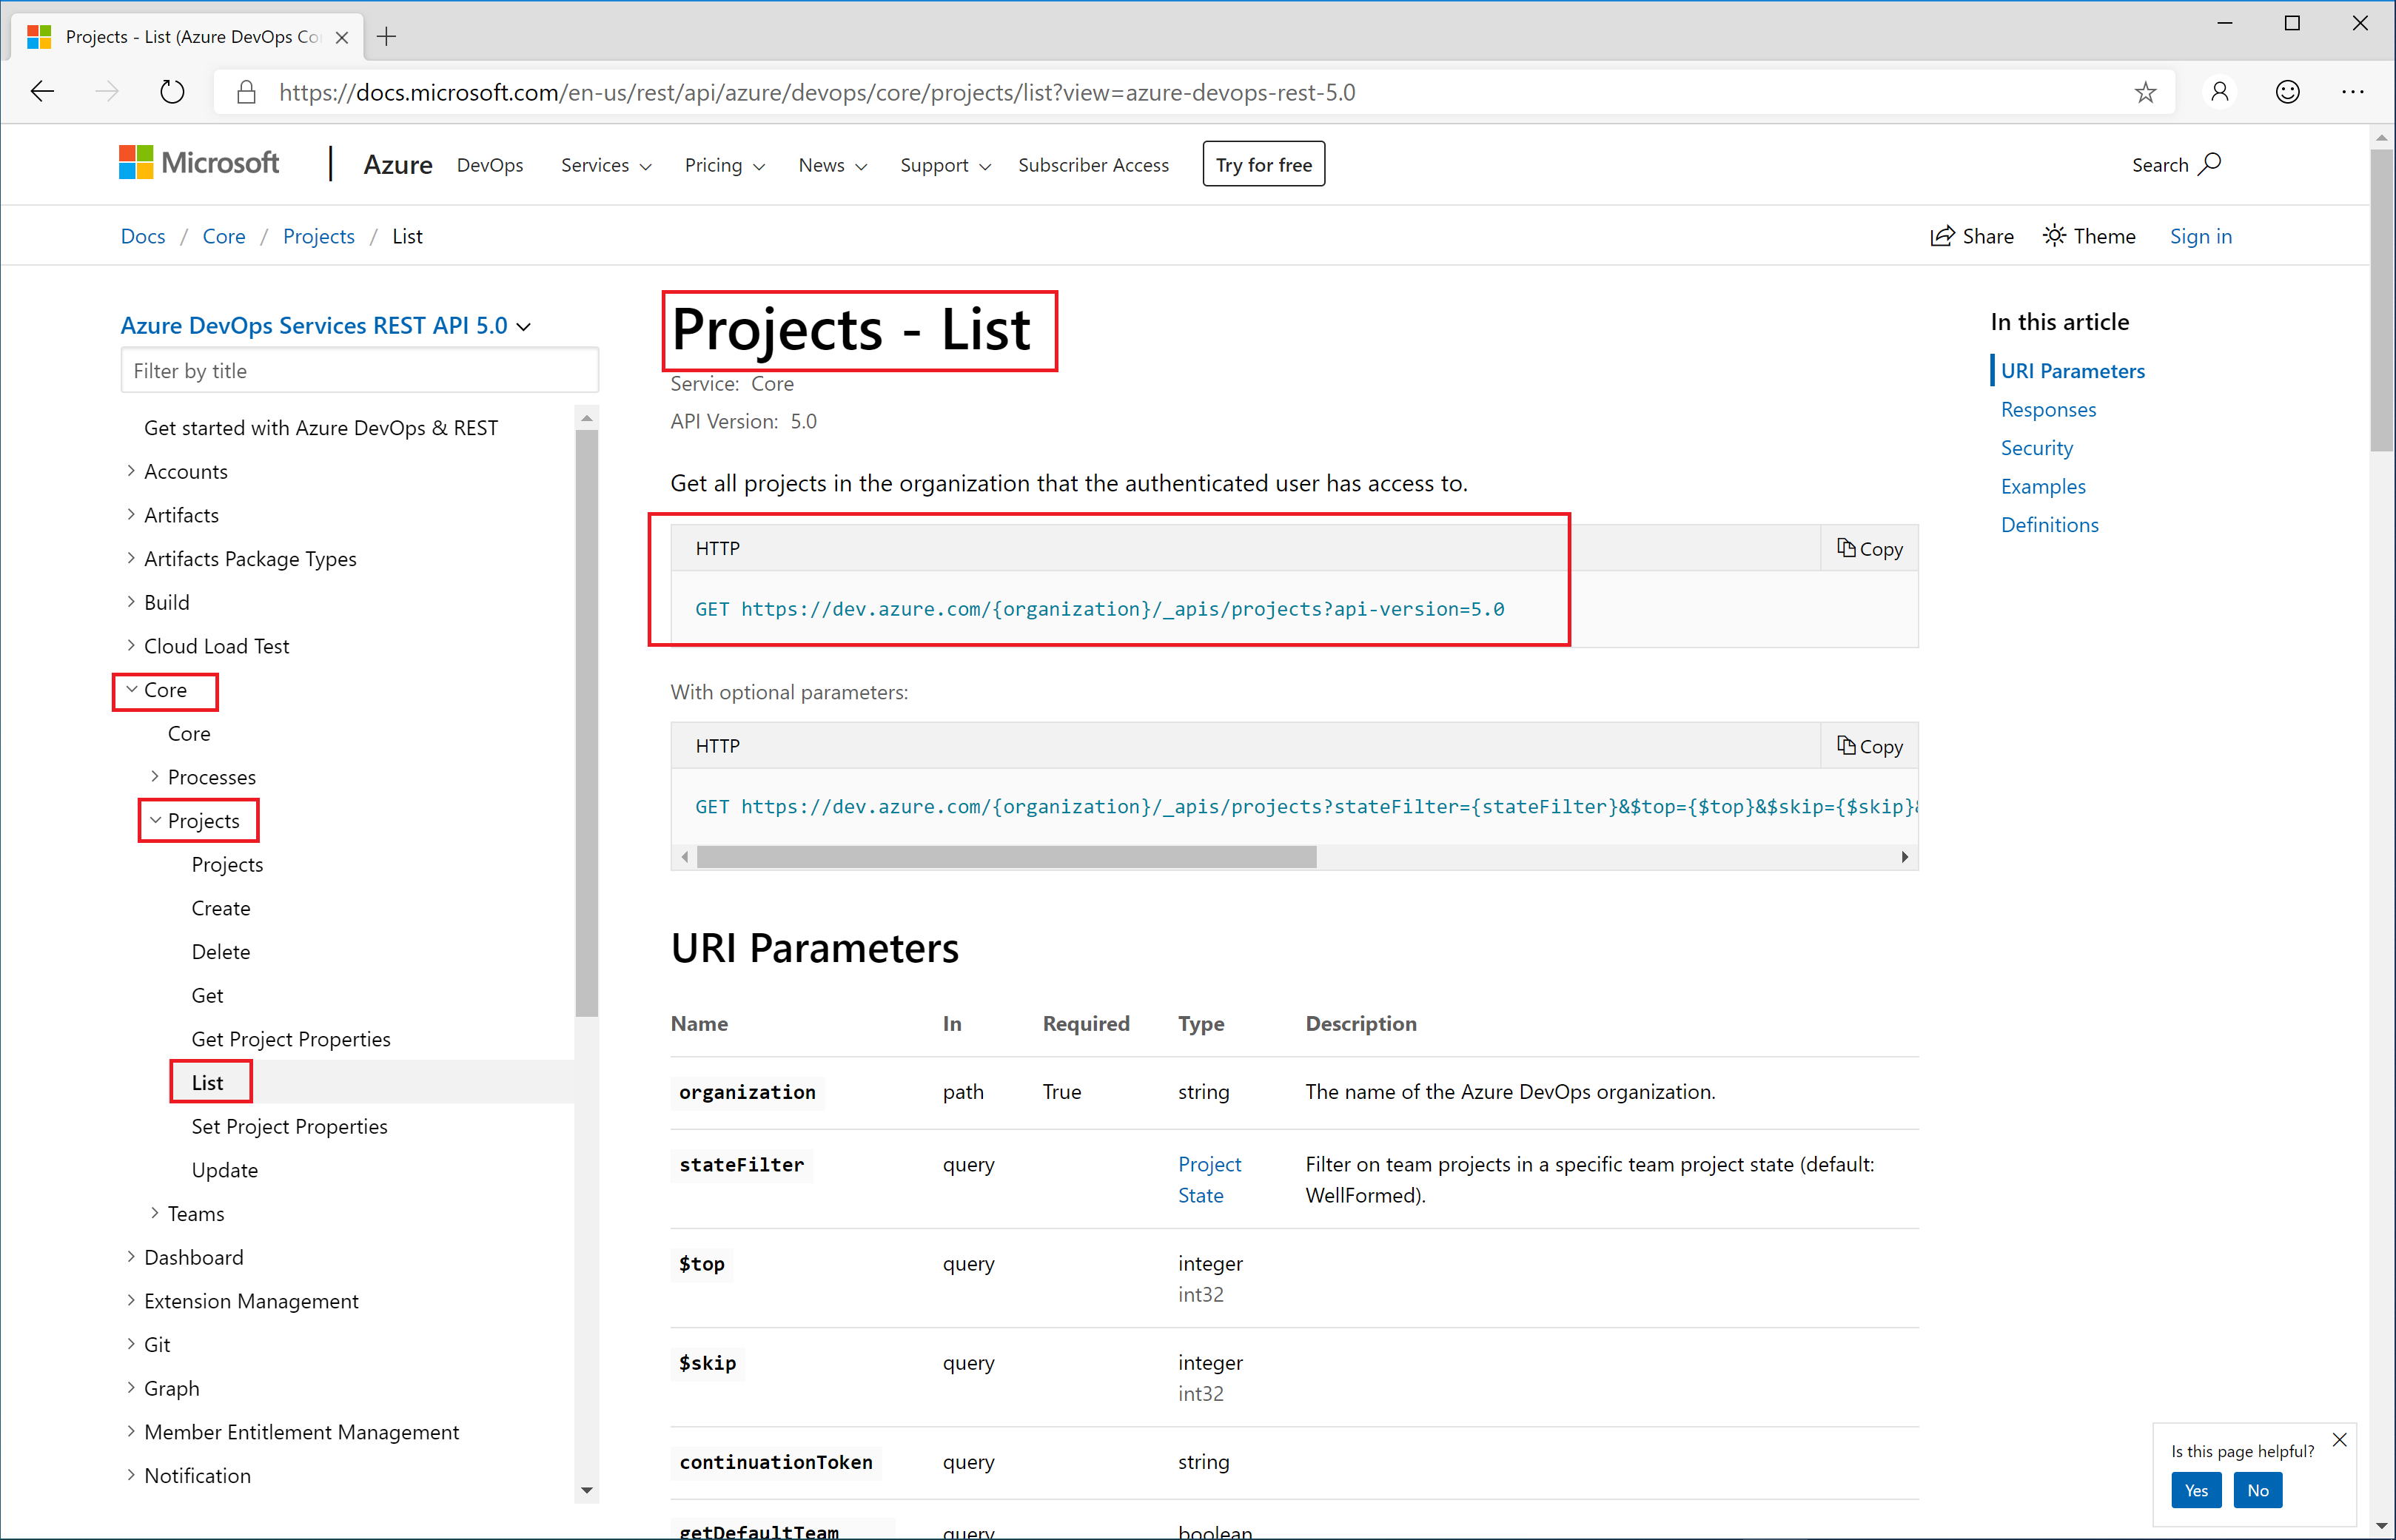
The Microsoft Documentation provides an example getting a list of projects for your organization. Since .NET Core 2 no longer has an HttpContent.ReadAsAsync method, we have modified the code slightly:
using Newtonsoft.Json;
using System;
using System.Diagnostics;
using System.Net.Http;
using System.Net.Http.Headers;

namespace SampleRestAPI
{
    class Program
    {
        private static readonly string personalAccessToken = "<YOUR PAT TOKEN>";
        private static readonly string OrgName = "<YOUR ORGANIZATION>";

        static void Main(string[] args)
        {

            //encode your personal access token
            string credentials = Convert.ToBase64String(System.Text.ASCIIEncoding.ASCII.GetBytes(string.Format("{0}:{1}", "", personalAccessToken)));

            ListOfProjectsResponse.Projects viewModel = null;

            //use the httpclient
            using (var client = new HttpClient())
            {
                client.BaseAddress = new Uri($"https://dev.azure.com/{OrgName}");  //url of your organization
                client.DefaultRequestHeaders.Accept.Clear();
                client.DefaultRequestHeaders.Accept.Add(new System.Net.Http.Headers.MediaTypeWithQualityHeaderValue("application/json"));
                client.DefaultRequestHeaders.Authorization = new AuthenticationHeaderValue("Basic", credentials);

                //connect to the REST endpoint
                HttpResponseMessage response = client.GetAsync($"{client.BaseAddress}/_apis/projects?stateFilter=All&api-version=5.0").Result;

                //check to see if we have a successful response
                if (response.IsSuccessStatusCode)
                {
                    //set the viewmodel from the content in the response
                    string json = response.Content.ReadAsStringAsync().Result;
                    viewModel = JsonConvert.DeserializeObject<ListOfProjectsResponse.Projects>(json);
                }
                else
                {
                    //process error message
                    var errorMessage = response.Content.ReadAsStringAsync().Result;
                    Trace.TraceError(errorMessage);
                }
            }
        }
    }
}
If you paste this code in a .NET Core Console Application, then you will also need to define a class ListOfProjectsResponse.Projects from the JSON response. There are multiple ways of doing this.
In order to obtain a JSON response in the first place, you can use a tool such as Postman.
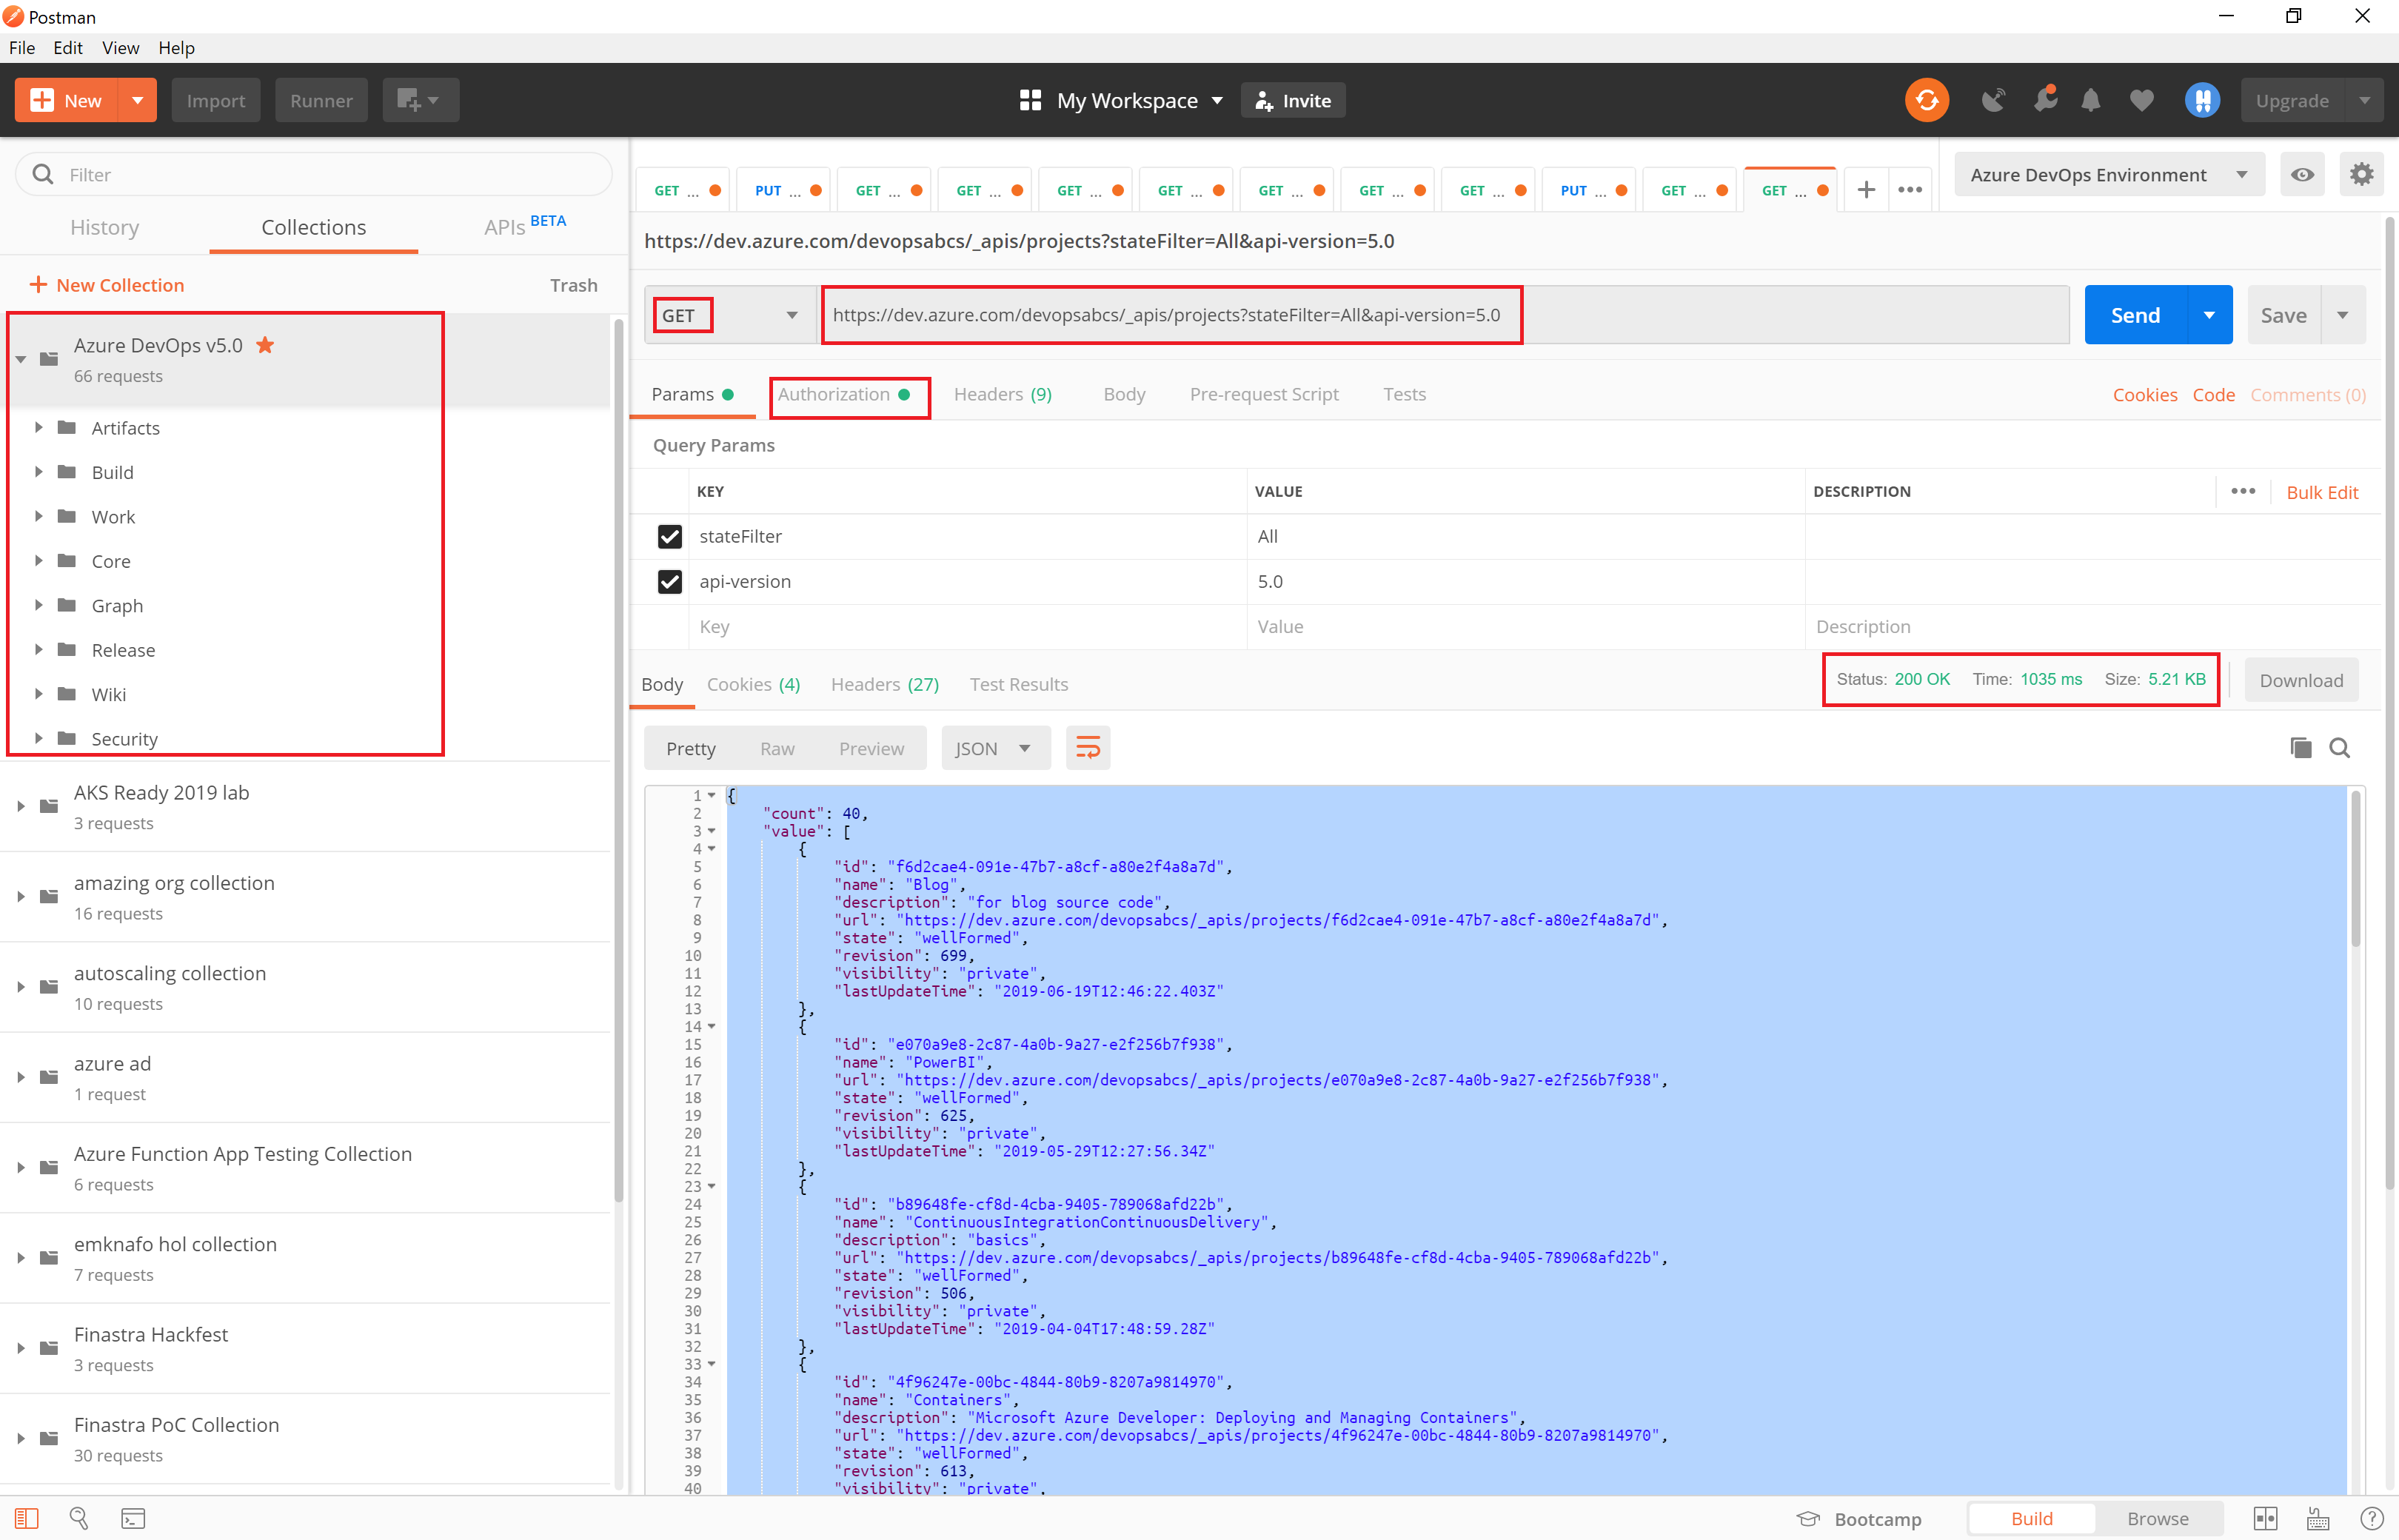
There is a useful Azure DevOps Postman collection that can get you up and running quickly. Combining these tools together, we obtain the following C# class:
using System;

namespace ListOfProjectsResponse
{
    public class Projects
    {
        public int count { get; set; }
        public Value[] value { get; set; }
    }

    public class Value
    {
        public string id { get; set; }
        public string name { get; set; }
        public string description { get; set; }
        public string url { get; set; }
        public string state { get; set; }
        public int revision { get; set; }
        public string visibility { get; set; }
        public DateTime lastUpdateTime { get; set; }
    }

}
Some useful safeguards and tricks when using automatic class generation tools:
- Ensure that you are generating classes from as complete and diversified JSON responses as you can. If not, you may need to complete or fix the classes manually using the REST API documentation. These fixes may also include changing the property type (e.g. from
inttofloat). - If the JSON properties contain characters not permitted in property names then you may need to use attributes such as:
        public class Fields
        {
            [JsonProperty(PropertyName = "System.AreaPath")]
            public string SystemAreaPath { get; set; }
            [JsonProperty(PropertyName = "System.TeamProject")]
            public string SystemTeamProject { get; set; }
            [JsonProperty(PropertyName = "System.IterationPath")]
            public string SystemIterationPath { get; set; }
            [JsonProperty(PropertyName = "System.WorkItemType")]
            public string SystemWorkItemType { get; set; }
            [JsonProperty(PropertyName = "System.State")]
            public string SystemState { get; set; }
            [JsonProperty(PropertyName = "System.Reason")]
            public string SystemReason { get; set; }
            [JsonProperty(PropertyName = "System.AssignedTo")]
            public SystemAssignedto SystemAssignedTo { get; set; }
            [JsonProperty(PropertyName = "System.CreatedDate")]
            public DateTime SystemCreatedDate { get; set; }
            [JsonProperty(PropertyName = "System.CreatedBy")]
            public SystemCreatedby SystemCreatedBy { get; set; }
            [JsonProperty(PropertyName = "System.ChangedDate")]
            public DateTime SystemChangedDate { get; set; }
            [JsonProperty(PropertyName = "System.ChangedBy")]
            public SystemChangedby SystemChangedBy { get; set; }
            [JsonProperty(PropertyName = "System.CommentCount")]
            public int SystemCommentCount { get; set; }
            [JsonProperty(PropertyName = "System.Title")]
            public string SystemTitle { get; set; }
            [JsonProperty(PropertyName = "System.BoardColumn")]
            public string SystemBoardColumn { get; set; }
            [JsonProperty(PropertyName = "System.BoardColumnDone")]
            public bool SystemBoardColumnDone { get; set; }
            [JsonProperty(PropertyName = "Microsoft.VSTS.Scheduling.RemainingWork")]
            public float MicrosoftVSTSSchedulingRemainingWork { get; set; }
	    [JsonProperty(PropertyName = "Microsoft.VSTS.Common.StateChangeDate")]
            public DateTime MicrosoftVSTSCommonStateChangeDate { get; set; }
	    [JsonProperty(PropertyName = "Microsoft.VSTS.Common.Priority")]
            public float MicrosoftVSTSCommonPriority { get; set; }
	    [JsonProperty(PropertyName = "Microsoft.VSTS.Common.ValueArea")]
            public string MicrosoftVSTSCommonValueArea { get; set; }
	    [JsonProperty(PropertyName = "Microsoft.VSTS.Scheduling.Effort")]
            public float MicrosoftVSTSSchedulingEffort { get; set; }
            //public string WEF_1CF533FEA38947A28C3BFCE684354680_KanbanColumn { get; set; }
            //public bool WEF_1CF533FEA38947A28C3BFCE684354680_KanbanColumnDone { get; set; }
	    [JsonProperty(PropertyName = "System.Description")]
            public string SystemDescription { get; set; }
}- Certain JSON responses have different variants possible. For instance, when you get service endpoints from a project, then, depending on the service endpoint type, you will end up with different
dataas well as differentEndpointAuthorization. An example is in order. Agitservice endpoint withauthorization scheme“UsernamePassword” may have JSON like this:
        {
            "data": {},
            "id": "a660b887-8c0a-4052-bff1-0b624548d741",
            "name": "DG_DevOpsDemoGenerator-code",
            "type": "git",
            "url": "https://dev.azure.com/devopsabcs/DevOpsDemoGenerator/_git/DevOpsDemoGenerator",
            "createdBy": {
                "displayName": "manu k",
                "id": "56c9c9f2-2c3b-663e-9543-57e7324a46bb",
                "uniqueName": "emmanuel@devopsabcs.com"
            },
            "authorization": {
                "parameters": {
                    "username": "tokenOrAnyThingYouWant"
                },
                "scheme": "UsernamePassword"
            },
            "isShared": false,
            "isReady": true,
            "owner": "Library"
        }
On the other hand, an azurerm service endpoint with authorization scheme “ServicePrincipal” can look like:
        {
            "data": {
                "subscriptionId": "630c0928-1c45-42d3-ba99-d0e2e92bd1f1",
                "subscriptionName": "Visual Studio Premium with MSDN",
                "environment": "AzureCloud",
                "scopeLevel": "Subscription",
                "creationMode": "Automatic",
                "azureSpnRoleAssignmentId": "1d7c9fba-7e43-42c0-841a-539c022583d0",
                "azureSpnPermissions": "[{\"roleAssignmentId\":\"8e82494b-cc9d-4a9f-9be2-c391a2939853\",\"resourceProvider\":\"Microsoft.RoleAssignment\",\"provisioned\":true},{\"roleAssignmentId\":\"1d7c9fba-7e43-42c0-841a-539c022583d0\",\"resourceProvider\":\"Microsoft.RoleAssignment\",\"provisioned\":true}]",
                "spnObjectId": "10c81ad9-9151-433e-b51a-956ae8e1915a",
                "appObjectId": "836a59a5-603a-4e03-a8df-161afa31e423"
            },
            "id": "13c6d211-cc14-4ab3-80f9-37b0bf9205b6",
            "name": "HOL_DevTestResources",
            "type": "azurerm",
            "url": "https://management.azure.com/",
            "createdBy": {
                "displayName": "manu k",
                "id": "56c9c9f2-2c3b-663e-9543-57e7324a46bb",
                "uniqueName": "emmanuel@devopsabcs.com"
            },
            "authorization": {
                "parameters": {
                    "tenantid": "a34c69c7-8959-474a-9690-e98bfb0b55c6",
                    "serviceprincipalid": "c5c64fa5-85d6-46ec-9b1c-fb915d7599d0",
                    "authenticationType": "spnKey",
                    "scope": "/subscriptions/630c0928-1c45-42d3-ba99-d0e2e92bd1f1/resourcegroups/holDevTestRG"
                },
                "scheme": "ServicePrincipal"
            },
            "isShared": false,
            "isReady": true,
            "operationStatus": {
                "state": "Ready",
                "statusMessage": ""
            },
            "owner": "Library"
        }
From the JSON, we see that both types would generate different C# classes especially in relation to the data and authorization properties. One way to deal with this is to loosen the class structure by using the Newtonsoft.Json.Linq.JObject type as is done here:
    public class ServiceEndpointModel
    {
        public JObject data { get; set; }
        public string id { get; set; }
        public string name { get; set; }
        public string type { get; set; }
        public string url { get; set; }
        public CreatedBy createdBy { get; set; }
        public JObject authorization { get; set; }
        public bool isReady { get; set; }
}- Autogeneration is not always clever enough to reuse children classes and often creates separate children classes even though they may in fact be the same class. In this case, you should manually de-dupe and reuse classes whenever possible in order to increase maintainability of the code.
The Azure DevOps REST API is a powerful and versatile interface empowering us to automate almost anything involving Azure DevOps. The Migration Tool described here leverages the API to allow us to clone or even merge multiple projects into “One Project To Rule Them All”.
In this Blog post, we’ve learned fundamental techniques enabling us to make the most out of the Azure DevOps REST API. In the third and final part of this Blog series, we dive into security concepts and principles necessary in locking down a single project housing multiple merged projects.